JMP Clinical Recoder
This Add-In enables a user to select any of the domains for any of the studies registered to JMP Clinical and change how a value is encoded, map multiple values to a single value or split a single value into multiple values. Once the changes have been made, the user saves the data set (assuming they have write permission for the files) and then either refreshes the study or adds it back to save the changes.
This Add-In is included in JMP Clinical and is automatically registered when you first launch JMP Clinical.
| 8 | To access this tool, click  on the JMP Clinical Main Window to open the JMP Home Window. on the JMP Clinical Main Window to open the JMP Home Window. |
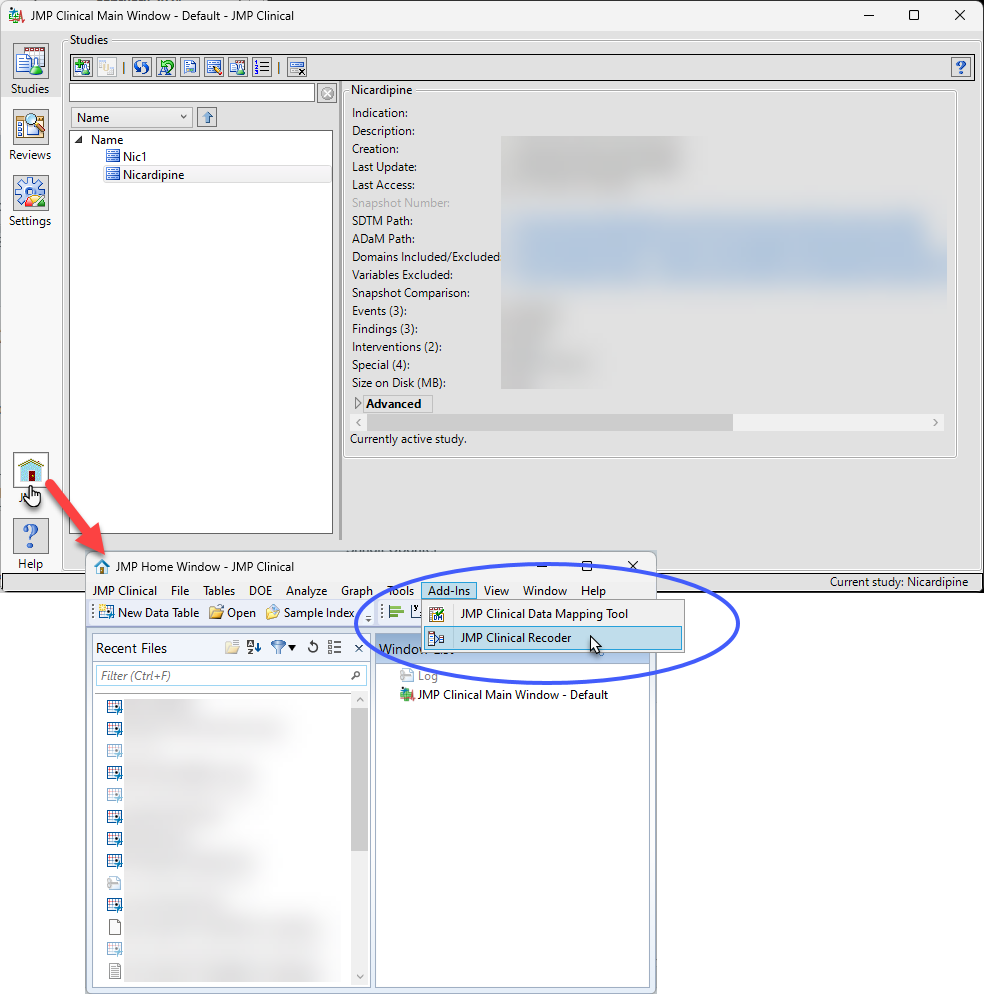
| 8 | Click Add-Ins > JMP Clinical Data Mapping Tool to open the tool. |
Recoding Study Data Tables
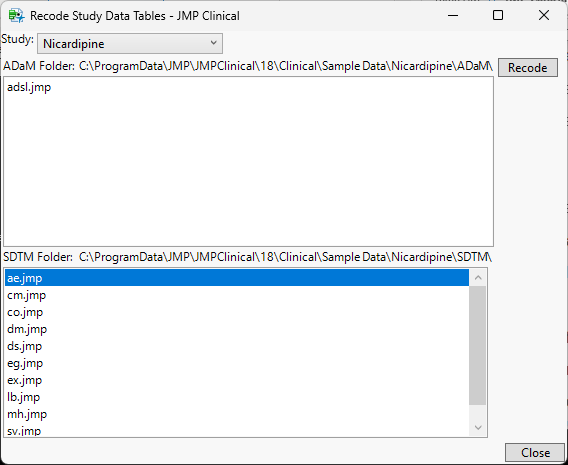
When you open the Recoder, you find that the study specified as the Current Study on the Studies tab of the JMP Clinical Main Window is selected. Furthermore, the location and contents of the ADaM data folder and the SDTM folder in the study are listed.
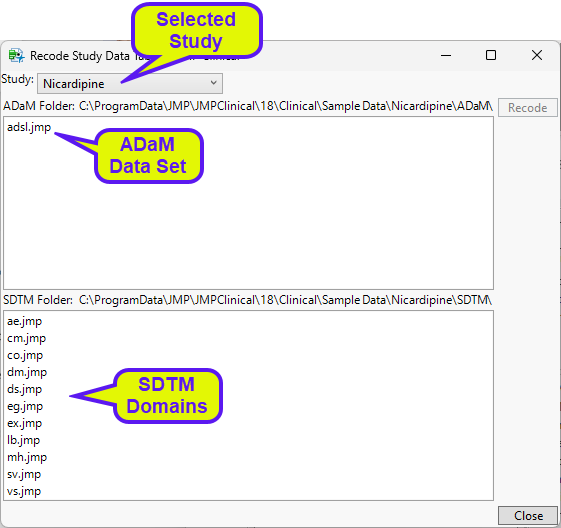
| 8 | Use the Study drop down menu to view all of the registered studies and to select another study, if desired. |
When you select a different study, the ADam Folder and SDTM Folder fields are updated to the files in the newly selected study.
Note: The listed files include all of the files in the ADaM and SDTM folders, even those that may not have been registered when the study was first added. You can recode any of these files. Once modified, you can refresh the study to update registered data files, but you will have to re-Add the study to incorporate any unregistered files.
In the following example, we recode the AE domain.
Note: You may recode only one data set at a time.
| 8 | Select AE. |
The button becomes active once you select a data set to recode.

| 8 | Click to open the underlying data table and show the Recode dialog with the first column in the data table selected. The unique values for the selected column are shown. The new value(s) can be entered directly in the space to the right. |
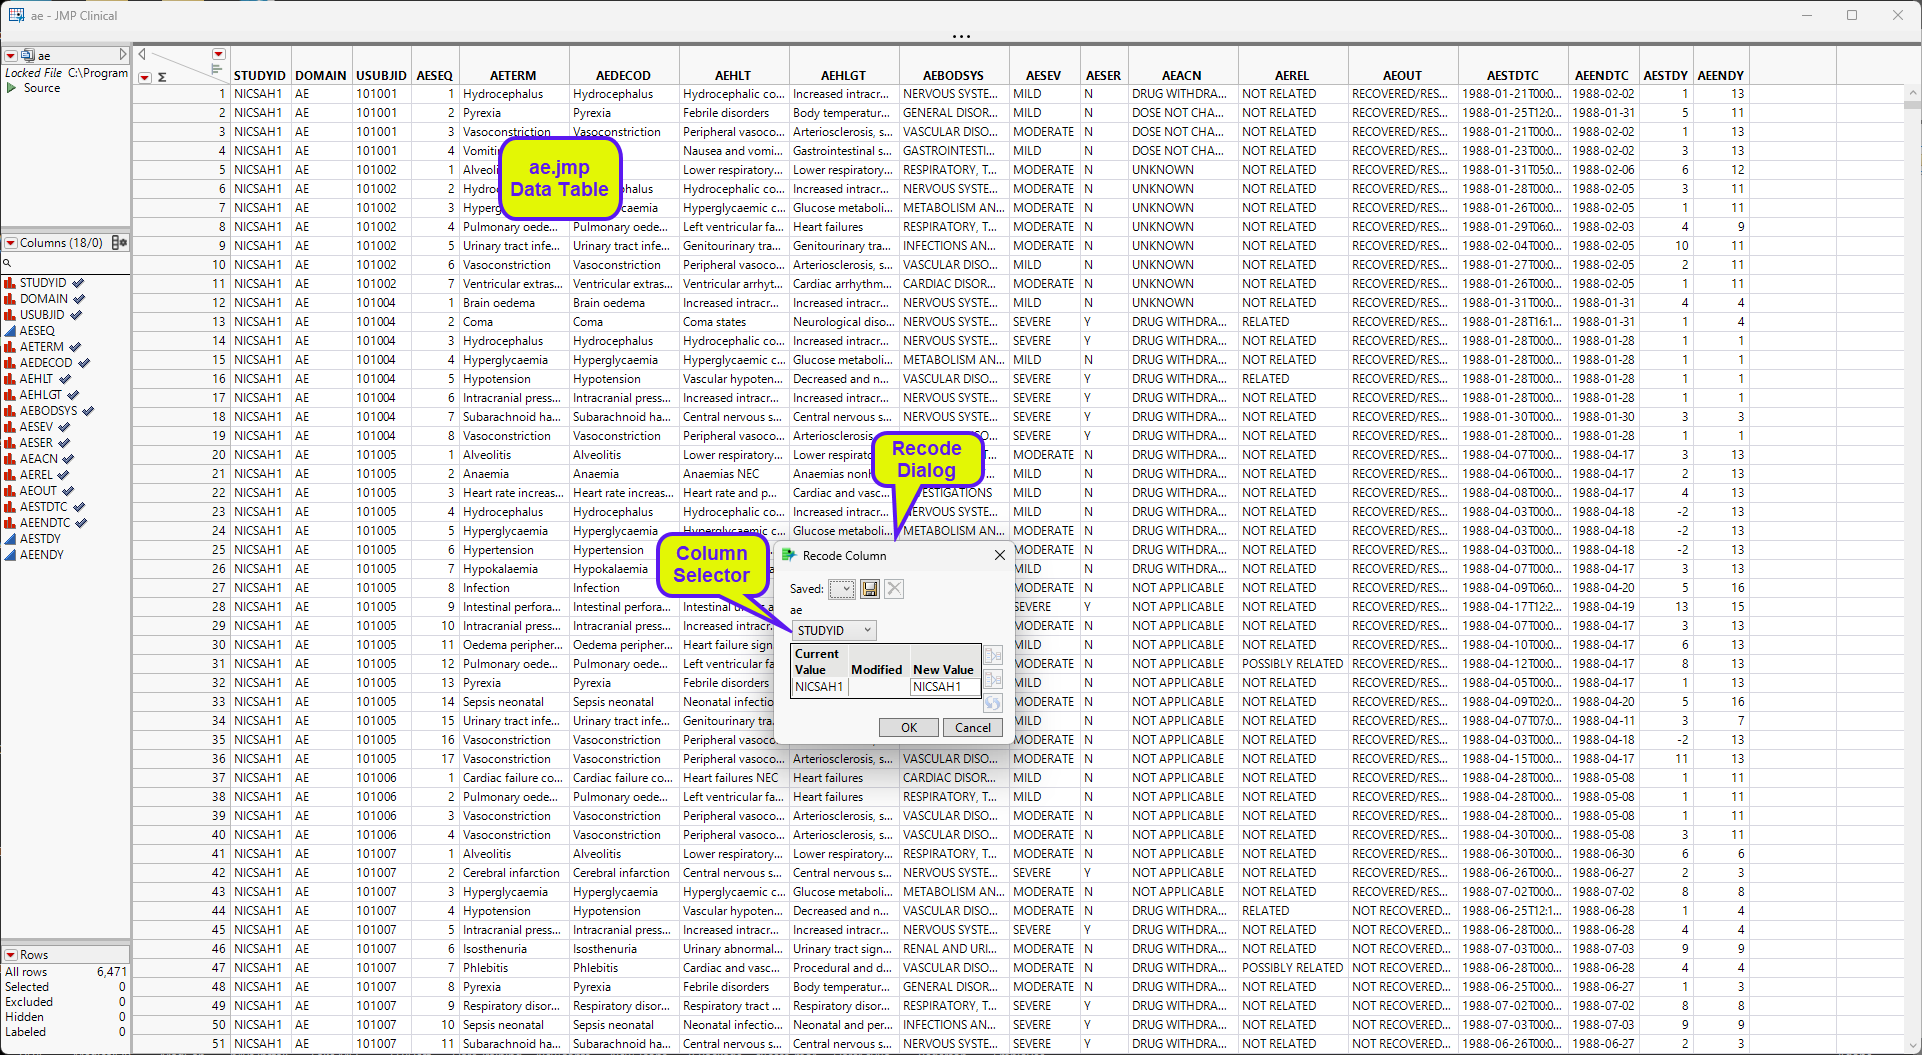
| 8 | Use the drop down menu to switch columns. In this example, we recode values in the AEDECOD column. |
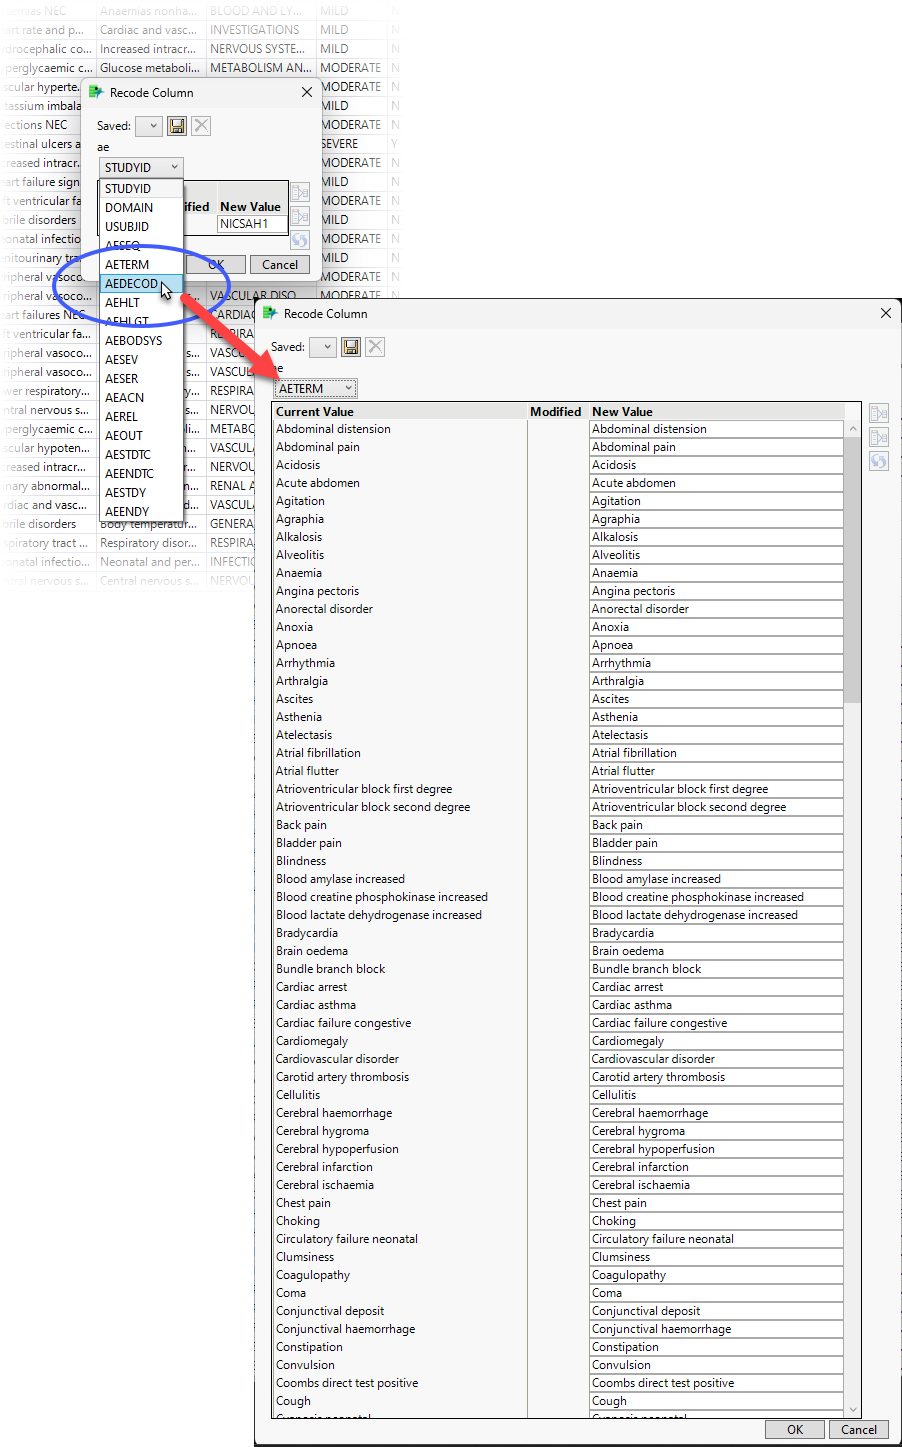
We can now use the recoder to perform a number of operations. We can change the name of a non-standard value to the standard value or even just to correct the spelling. We can also combine multiple terms into a single term and break up a collective term into component parts.
Changing a Value
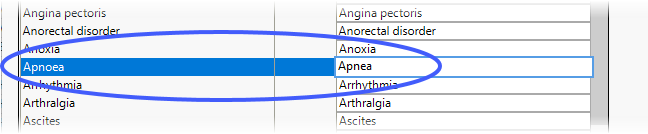
To change a value, simply specify the new value in the text box to the right of the old value. In this example, we change the spelling of Apnoea to Apnea.
| 8 | Highlight the value in the New Value text box and enter the corrected term. |
Combining Multiple Values into a Single Value
Suppose the investigators at different sites used different values to indicate the same adverse event. Alternatively, suppose they were too granular and recorded individual facets of a single event as separate events. You can combine those values into a single collective value.
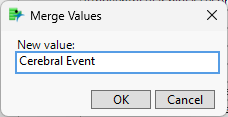
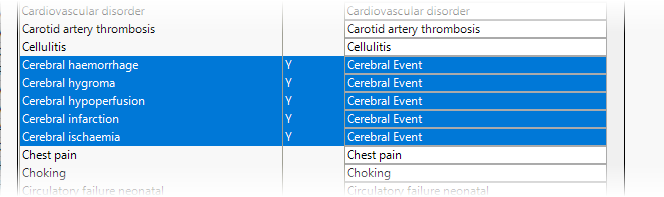
In this example, we combine all cerebral events into a single group call Cerebral Event.
Note: We recognize that this example is clinically irresponsible. It is done here for demonstration purposes only.
| 8 | Highlight all of the AE terms that begin with the term Cerebral. |
| 8 | Click  to bring up the Merge Values window. to bring up the Merge Values window. |
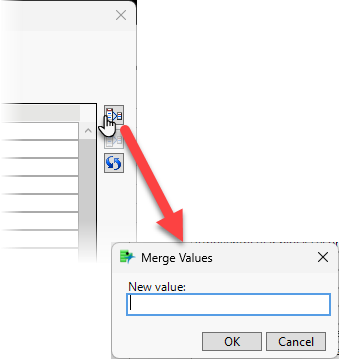
| 8 | Enter the desired term in the text box. |
| 8 | Click . |
Note that a "Y" has been entered where the values have been modified.
Splitting One Value into Multiple Values
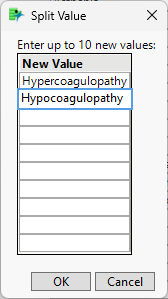
Suppose the investigators were not granular enough. Suppose they lumped all the subjects with abnormal bleeding into one group called Coagulopathy without regards to whether subjects bled excessively long or clotted excessively fast. In this example, we split the term Coagulopathy into two terms: Hypercoagulopathy and Hypocoagulopathy.
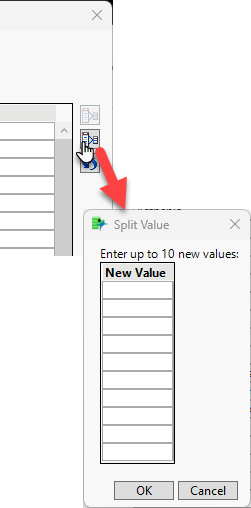
| 8 | Highlight Coagulopathy and click to bring up the Split Value window. |
| 8 | Enter Hypercoagulopathy on the first line and Hypercoagulopathy on the second. |
| 8 | Click . |

Note that an "S" has been entered where the value has been split.
Recoding the Modified Terms
Thus far, we have not recoded the data set. All we've done is indicated the values to be recoded and the type of recoding to be done.
| 8 | Examine the following figure. |
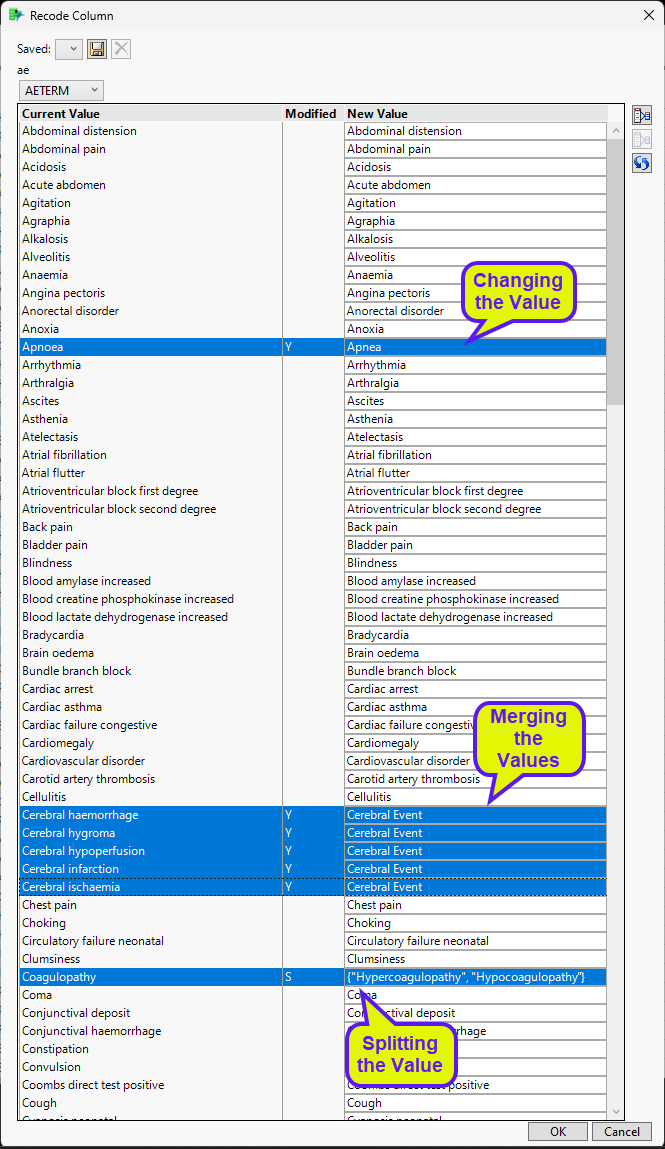
We've made all of our changes to the same column. We could have done more. We could have selected a different column and made changes to its values. However, we also have not made any changes yet. We could click and no changes would be made to the data set. The changes do not take effect until we click .
| 8 | Click . |
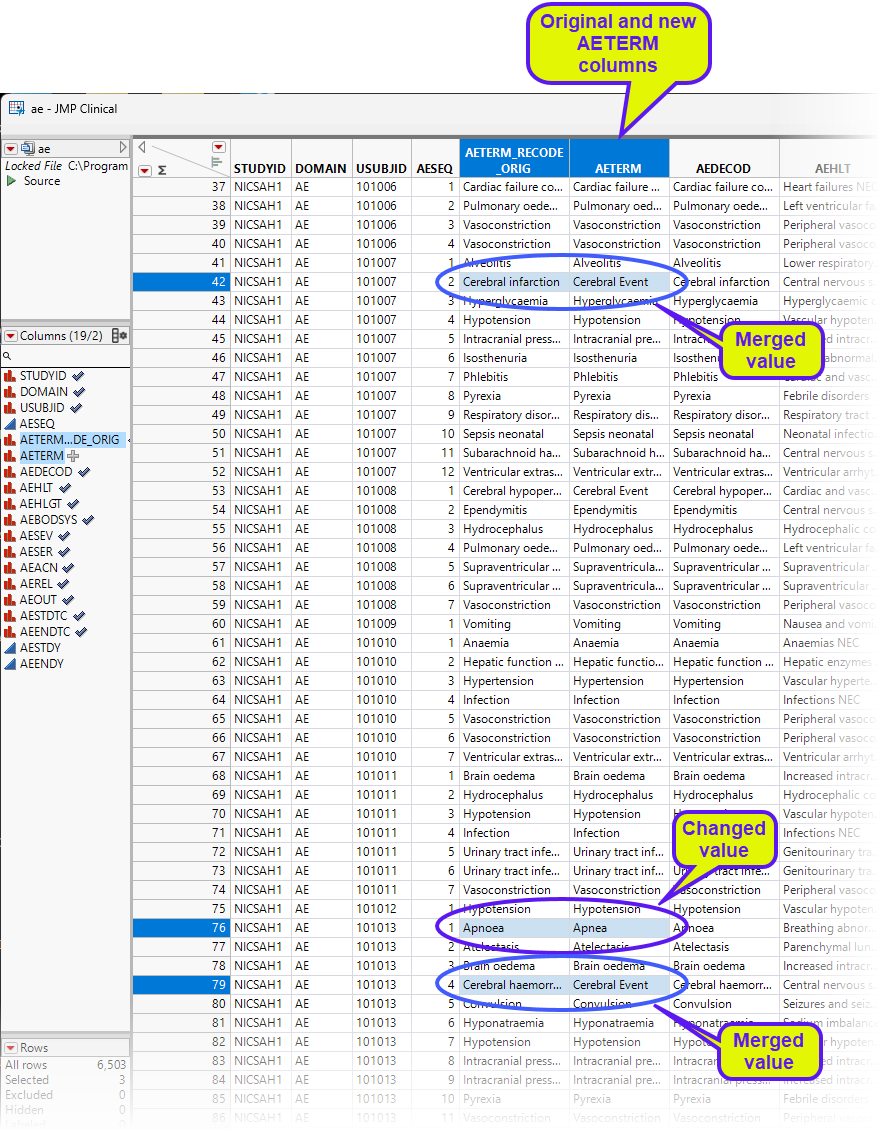
The recoded column has been named AETERM. If you scan down the column, you can see that Apnoea has been renamed Apnea (row 76) and two different Cerebral events have been combined into Cerebral Event (rows 42 and 79).
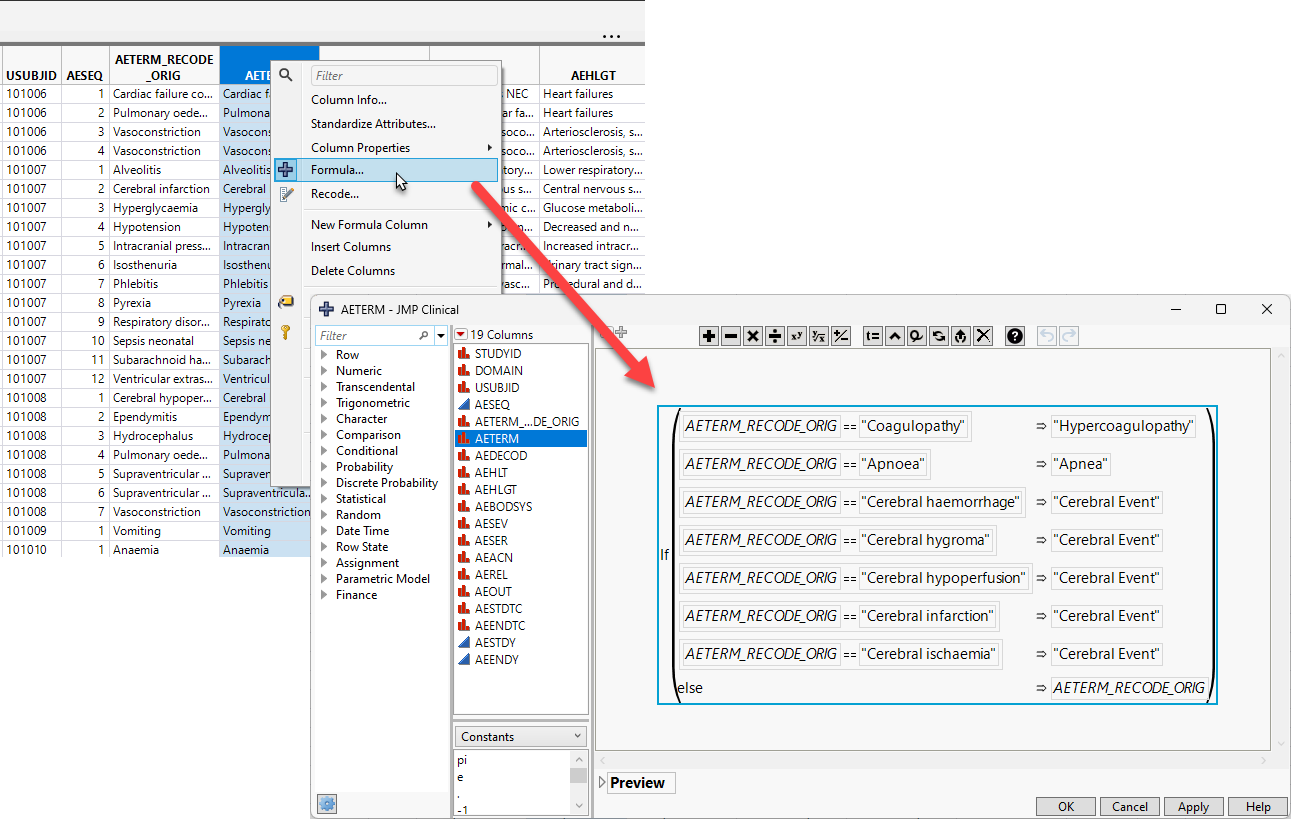
The original AETERM column has been saved but renamed to AETERM_RECODE_ORIG. This column is unchanged except for the name and has been kept for tracking and accountability purposes. Furthermore, if you right-click on the column name of the new AETERM column and select Formula you can see the formula used to make all of the changes to the column. This formula is inactivated once the changes to the column values have been made, but is saved for tracking and accountability purposes.
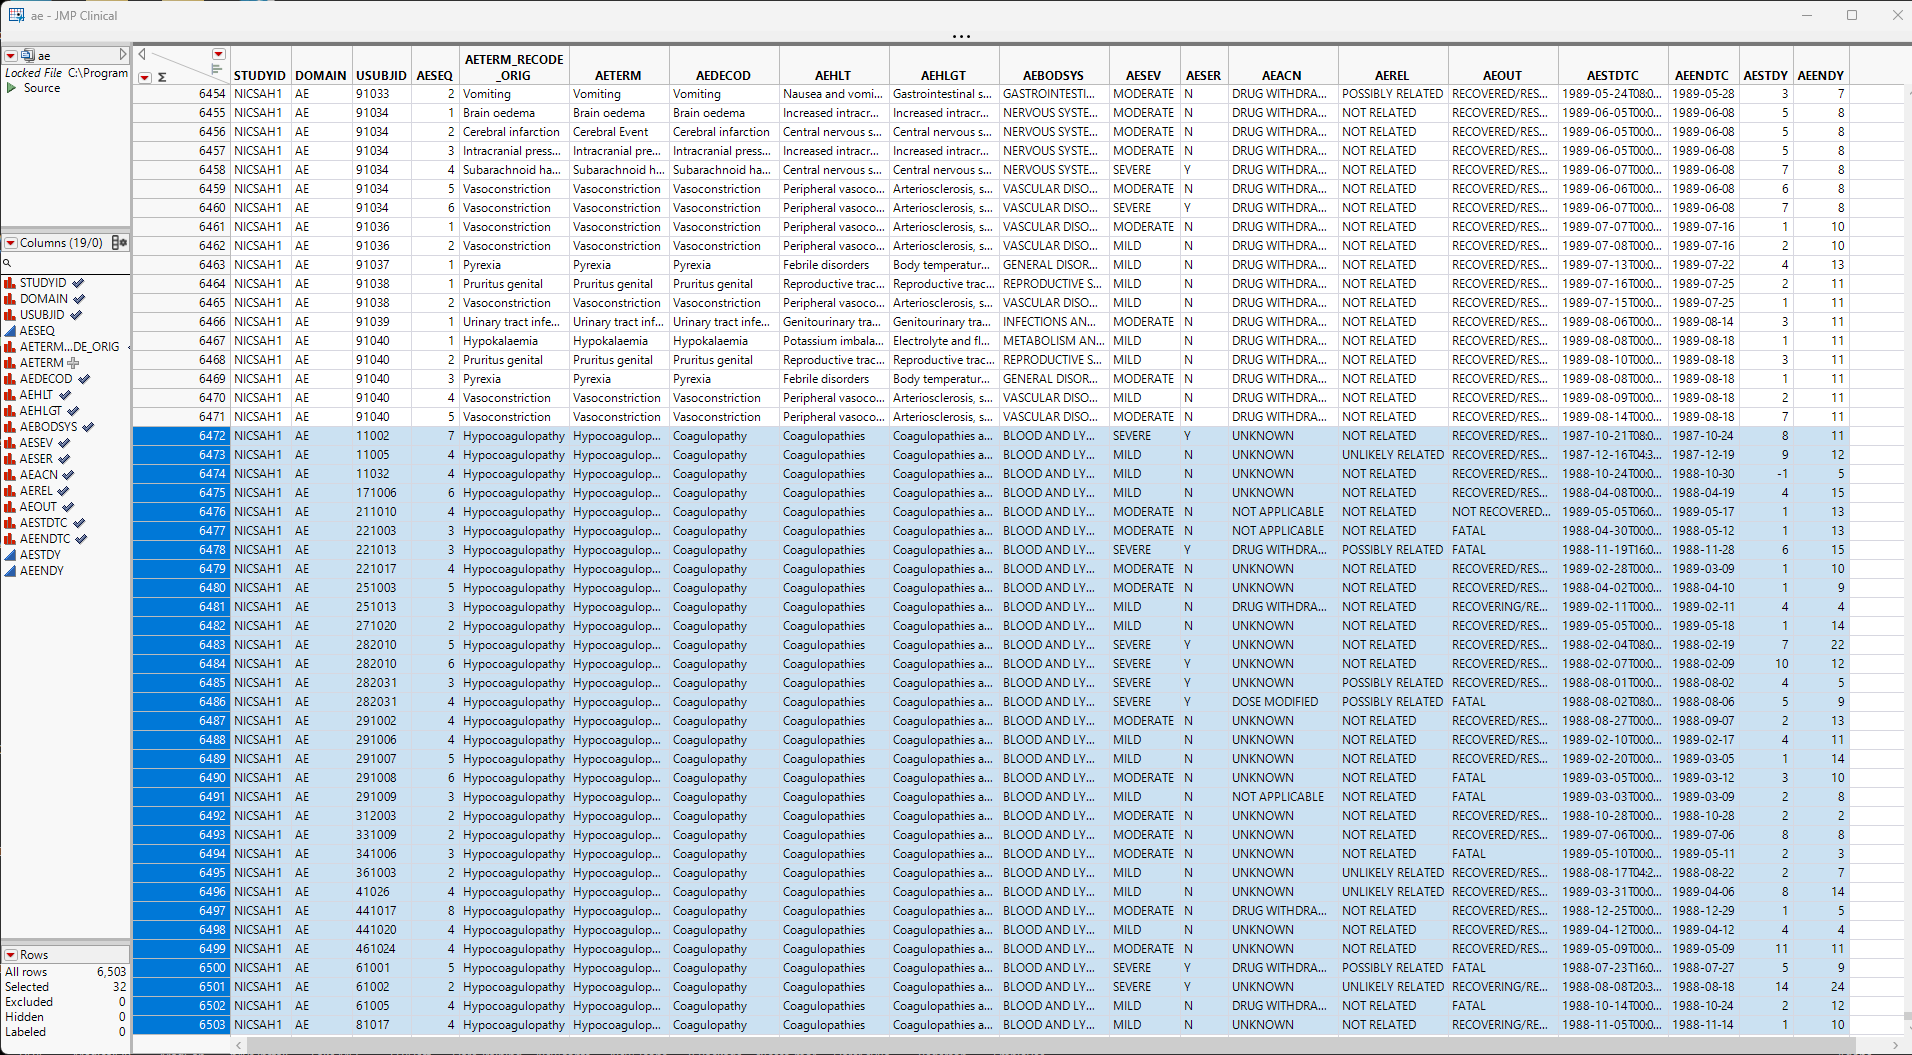
Finally, when values are split, the additional rows created for the 2nd, 3rd, ... values are added to the bottom of the table (see below). The original rows (1st value) remain in place in the body of the table. At this point, you must decide, subject by subject, which rows and values to keep and which to discard.
General Buttons
| • | Click  to use the drop down menu to view and open an existing data recoding template. to use the drop down menu to view and open an existing data recoding template. |
| • | Click  to save the current template. to save the current template. |
| • | Click  to clear all entries and reset the data mapping tool. to clear all entries and reset the data mapping tool. |