Specifying Folders, Files, and Data Sets
Specifying Folders
Specifying Folders When JMP Is Connected to SAS on Your Local Machine
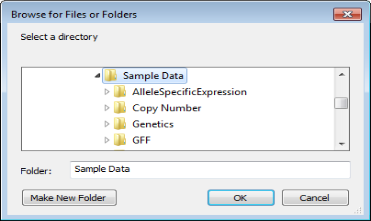
| 8 | Click to open the Browse for Files or Folders window. |

| 8 | Navigate to the desired folder, or enter the name and path to the folder in the Folder field. |
| 8 | Click . |
The name and path to the file or data set added to the text field of the process dialog.
Note: You can create a new folder by clicking  and then specifying a name for the new folder. The following characters cannot be used in the name: : $ % ^ & * ( ) = / \ | ; : ’ “ , < > ?
Specifying Folders When JMP Is Connected to SAS on a Server
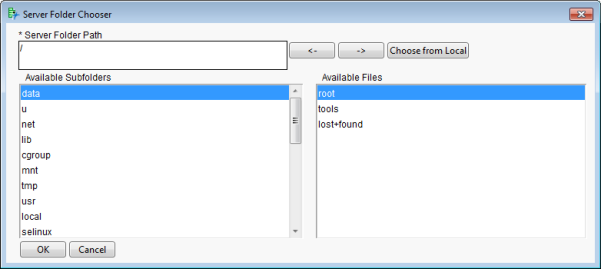
| 8 | Click to open the Server Folder Chooser window. |

The current server directory is shown in the Server Folder Path field.
Note: By default, when connected to a UNIX server, the root path of “/” is specified. When connected to a Windows server, “C:\” is considered the root, and is specified by default. You can enter another available drive in this field, if desired.
| 8 | Navigate up the directory tree with the button. |
| 8 | Select a subfolder from the Available Subfolders field and click the button to navigate down the directory tree. |
| 8 | Highlight the desired folder and click the button to populate the Server Folder Path field with it. |
| 8 | Click . |
Important: Make sure that you click the button after selecting the desired folder from the Available Subfolders field in order to populate the Server Folder Path field with the desired folder.
| 8 | Alternatively, click to surface a dialog for selecting a folder from your local machine. (See Specifying Folders When JMP Is Connected to SAS on Your Local Machine.) |
Note: Depending on the specific process, parameter, and context, the button might not be displayed in the Server Folder Chooser window.
The name and path to the file or data set added to the text field of the process dialog.
Specifying Files or Data Sets
Specifying Files or Data Sets When JMP Is Connected to SAS on Your Local Machine
| 8 | Click to open a file selection window (for example, Select SAS Data Set). |

Note: Depending on the specific file type or data set that you are selecting, the file selection window title might differ from the title shown in the example above.
| 8 | Navigate to and select the desired file, or enter the name and path to the file in the File name field. |
| 8 | Click . |
The name and path to the file or data set added to the text field of the process dialog.
Specifying Files or Data Sets When JMP Is Connected to SAS on a Server
| 8 | Click to open the Server File Chooser window. |

The current server directory is shown in the Server Folder Path field.
Note: By default, when connected to a UNIX server, the root path of “/” is specified. When connected to a Windows server, “C:\” is considered the root, and is specified by default. You can enter another available drive in this field, if desired.
| 8 | Navigate up the directory tree with the button. |
| 8 | Select a subfolder from the Available Subfolders field and click the button to navigate down the directory tree. |
| 8 | Highlight the desired file, click the button, and then click . |
| 8 | Alternatively, click to select a file from your local machine. (See Specifying Files or Data Sets When JMP Is Connected to SAS on Your Local Machine.) |
Note: Depending on the specific process, parameter, and context, the button might not be displayed in the Server File Chooser window.
The name and path to the file or data set added to the text field of the process dialog.