The Data Filter Panel
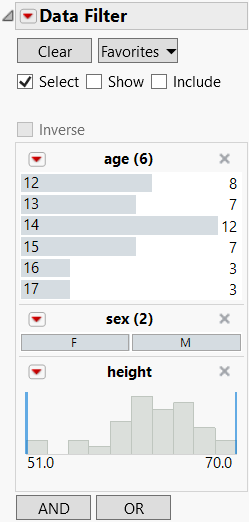
Once you have added columns in the initial window, the Data Filter panel appears.
Figure 9.8 Data Filter Panel
The main controls in the Data Filter panel include the following:
Clear
Clears all selections that you have made on variables in the Data Filter panel.
Favorites
Saves your current data filter criteria as a favorite. Once you have created a favorite, selecting it resets the current conditions to the criteria in the favorite. You can also remove the favorite. To retain favorites once the current session ends, save the data filter script by selecting one of the Save Script options from the Data Filter red triangle menu.
Select, Show, and Include
See Filtering Modes.
Inverse
Inverts the current selection state of the rows in the data table.
Note: Only the rows in the data table are inverted, not the selection in the Data Filter. To invert the selection in the Data Filter, from the column’s red triangle menu, select Invert Selection.
AND
The AND button opens the Add to Selected Group list. The and operator restricts the selection. You can add variables to the filter process at any time.
OR
The OR button opens the Add new OR Group list. The or operator extends the selection. You can add variables to the filter process at any time.
Changing the Row State in the Data Table After Making Data Filter Selections
If you have made selections in the Data Filter and subsequently alter row states in the data table, or select points in a graph or plot, the selections in the Data Filter might not match the selections in the data table. The Data Filter contains a warning message that says: “Your selection was changed in another window”. The Reset Selection button appears. Clicking the Reset Selection button changes the data table selections back to reflect the selections in the Data Filter.
Example of Changing Selections
1. Select Help > Sample Data Folder and open Big Class.jmp.
2. Select Analyze > Distribution.
3. Select age and sex and click Y, Columns.
4. Click OK.
5. Select Rows > Data Filter.
6. Select sex and click Add.
7. In the Data Filter control panel, select all of the males by clicking on the M block.
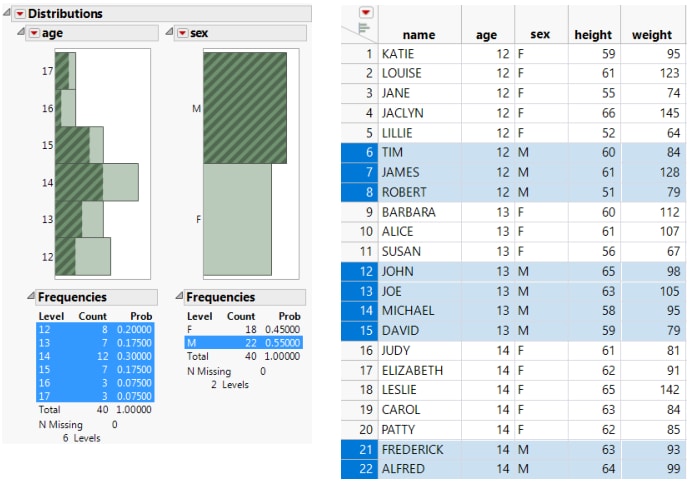
Figure 9.9 Rows Containing Males Highlighted in Data Table and Histograms
You can see that all of the rows containing males are highlighted in the data table and in the histograms. Now you decide that you want to see only the students who are age 12.
8. In the age histogram, select the bar representing age 12.
Now the selection does not match the Data Filter selection. A warning message and a Reset selection button appear in the Data Filter window.
Figure 9.10 Data Filter Warning Message and Reset Button


