Chromosome Segmentation Plots
Note: This tab only appears after you have drilled down into a region of the Chromosome Segmentation Summary plot. To generate this tab, follow the instructions listed in the Generating the Chromosome Segmentation Plots Tab section below.
The Chromosome Segmentation Plots tab is shown below:

The Chromosome Segmentation Summary tab contains the following elements:
| • | Plots of Intensity versus Physical Position for Each Sample and chromosome |
Study the graphs in this tab to see exactly how copy number is changing in each chromosome and sample. You can change properties of the graphs using the Display Options buttons on the left hand side. Click the Refresh button to apply the changes.
Generating the Chromosome Segmentation Plots Tab
To generate the plot shown above for the example used here, complete the following steps:
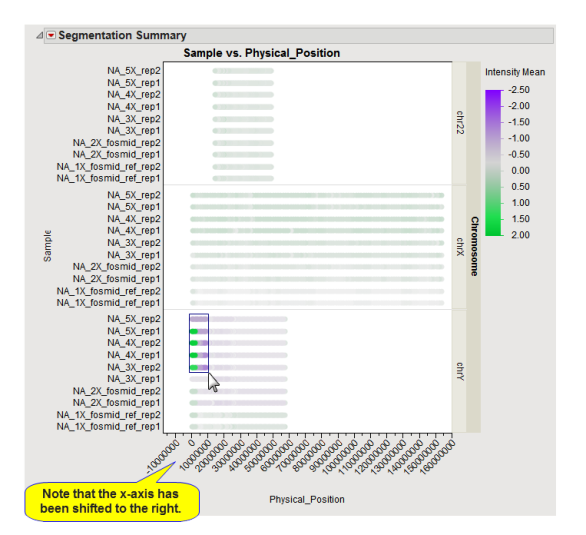
| 8 | Move your mouse to the x-axis of the graph on theChromosome Segmentation Summary tab until a hand icon appears with fingers pointing to the left. |
| 8 | Click and drag the axis to the right until you expose the very beginning of the chromosomes. |
| 8 | Move your mouse up, left-click and drag a rectangle around the first sections of Chromosome Y for the five samples NA_5X_rep2, NA_5X_rep1, NA_4X_rep2, NA_4X_rep1, and NA_3X_rep2. as shown below. Be sure to cover the breakpoints where green changes sharply to purple. |

| 8 | Click  in the Action Buttons pane to generate the Chromosome Segmentation Plots tab, shown above. in the Action Buttons pane to generate the Chromosome Segmentation Plots tab, shown above. |