Save Data Tables to a Database
You can save a data table to any database on your system that has a compliant ODBC (Open Database Connectivity) driver.
When exporting a data table to a database using ODBC, JMP exports the data as either character (CHAR or NCHAR) or numeric (FLOAT or DOUBLE PRECISION) data types. If a column is defined as a JMP date or time, the column exports as character data. The receiving database handles changing the data type to a proper date format.
1. First, connect to the database. See To add a new database connection.
2. Select File > Database > Save Table.
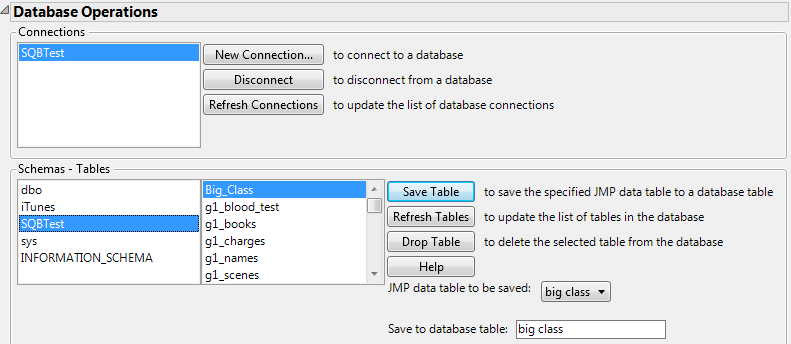
Figure 11.1 The Database Save Table Window
3. In the Connections box, highlight the name of the database to which you want to save the file (Figure 11.1). The Connections box contains a list of databases to which your system is connected.
4. From the JMP data table to be saved menu, select the open JMP data table that you want to save to the database.
5. In the Save to database table box, enter the name that you want the table to have when you save it in the database.
6. Click Save Table.
To add a new database connection
1. Click Connect.
2. Select the data source that you want and click OK. Or, to create a new source, click the New button (Windows) or Choose DSN button (macOS).
Depending on which data source you select (and which database drivers you have installed on your computer), you might be presented with a variety of windows. Use them to create the database source.
3. Select the database to which you want to save the file.
