Create Live Report
The Create Live Report process generates a publishable review/report of all open reports for uploading to the JMP Live portal or other website designated by your system administrator.
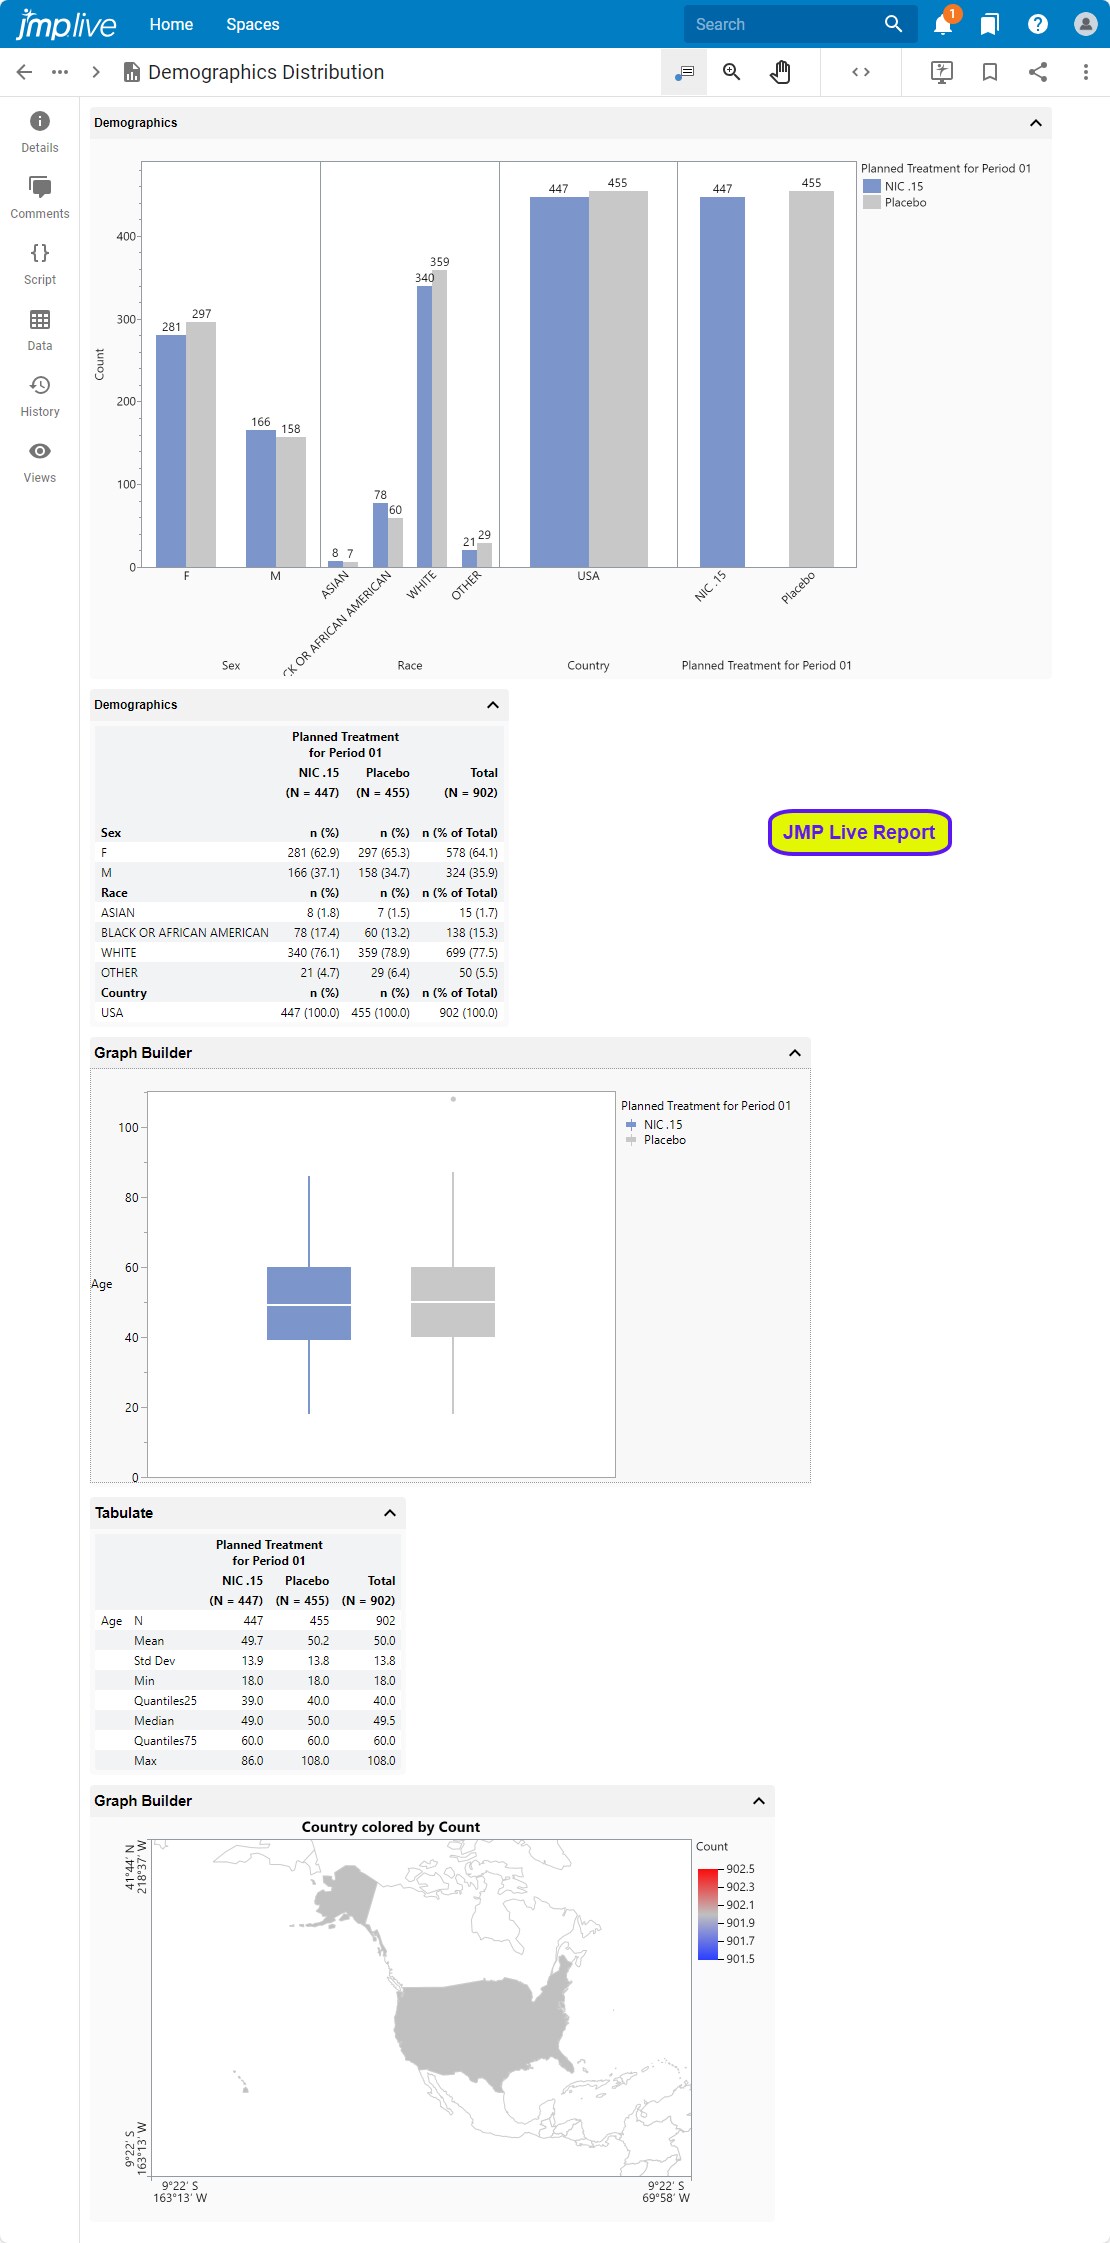
The JMP Live Report
The JMP Live Report, shown below, was generated after running the Demographics Distribution report using the Nicardipine sample data set.
Note: You must be a licensed JMP Live user to create a JMP Live report.
Note: Your JMP Clinical software must be configured for use with JMP Live. Refer to Configuring JMP Clinical for Use with JMP Live for more information.
See JMP Live Help for more information and instructions about using JMP Live.
Generating and Publishing a JMP Live Report
| 8 | Click the  action button at the top of any JMP Clinical review. action button at the top of any JMP Clinical review. |
The Create Live Report window opens.
Report Options
The following options enable you to tailor the JMP Live report to your specific needs:
Publish Notes
| 8 | Check the box to append the study notes to the end of your JMP Live report. |
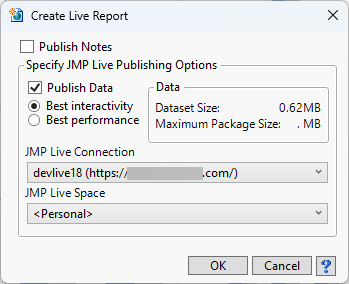
Publish Data
Check the box to include all data sets with your JMP Live report. You can choose to format the data for Best Interactivity, where all supported aspects of the report are fully interactive, or Best Performance, where images and graphs are not interactive, but supported data in the rest of the report remains interactive.
Note: If your data set is large, you might choose this option to increase the responsiveness of the report.
Data
The size of your data set(s) is shown as the Dataset Size:.
JMP Live Connection
Displays the URL to which you are publishing.
JMP Live Space
Use this widget to specify the space within the server where your report will be placed.
Publish a single Report or the whole Review
There are two Create Live Report buttons on the Review Builder, one for publishing the active report and one for publishing the entire review.
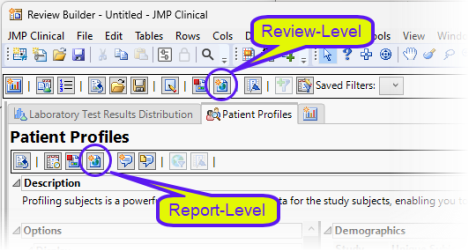
| 8 | Click the Report-Level button to publish the active report only (in this example, Patient Profiles) to JMP Live. |
| 8 | Click the Review-Level button to publish the entire review to JMP Live. |
The Create Live Report window and associated options are the same for both.
Configuring JMP Clinical for Use with JMP Live
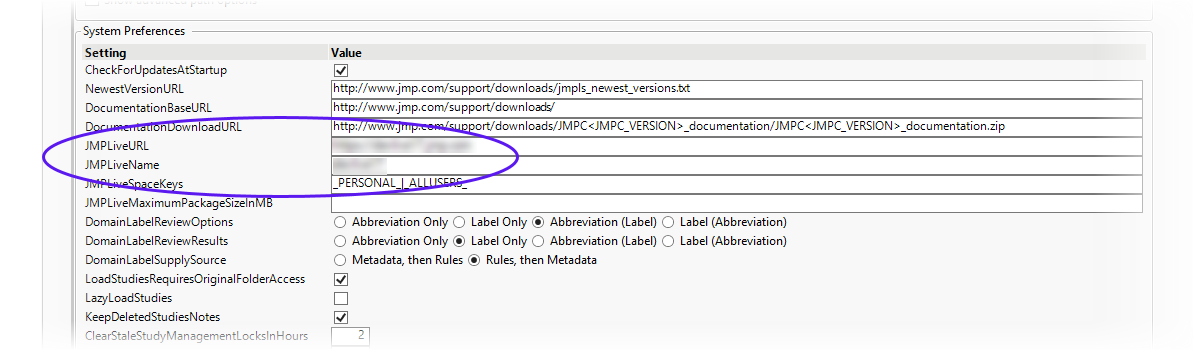
You must configure JMP Clinical software for JMP Live before you can create a JMP Live report. You must have both a JMPLiveURL and a JMPLiveName. If either are missing, JMP LIve will not work properly.
| 8 | Open JMP Clinical and click on the Settings button. |
| 8 | Click |

| 8 | Add your assigned JMP Live URL and JMP Live Name to the appropriate rows in the System Preferences box on the Manage Configurations window. |
| 8 | Click to close the Manage Configurations window. |
Note: The JMP Live URL is the URL to the JMP Live instance. If more than one JMP Live instance, separate with vertical bars (|). The JMP Live Name is the name of your choice corresponding to each JMP Live instance. If you have more than one JMP Live instance, separate with vertical bars (|).
Note: Consult your System Administrator for your assigned JMP Live URL and JMP Live Name.
Note: You must close and relaunch JMP Clinical for changes to the Settings tab and Manage Configurations window to take effect.
Interacting with Distribution Reports in JMP Live
Distribution reports ( Adverse Events Distribution, Adverse Events Incidence Rates, Adverse Events Multiple Occurrences Distribution, Events Distribution, Events Multiple Occurrences Distribution, Findings Distribution, Interventions Distribution, Interventions Multiple Occurrences Distribution ) with Report Filters must be configured properly if they are to function interactively in JMP Live.
| 8 | Click  on the JMP Clinical Main window to open the Studies tab. on the JMP Clinical Main window to open the Studies tab. |
| 8 | Click  to open the Set Study Preferences window. to open the Set Study Preferences window. |
| 8 | Click  to open the Advanced section. to open the Advanced section. |
| 8 | Select Natural Sort Order on the Sort Distribution Report table by: widget. |
| 8 | Click to close the Set Study Preferences window. |
| 8 | Close and restart JMP Clinical. |